Looking for HubSpot CRM Setup Guide? Go here!
This article covers adding workflow extensions and webhook triggers based on a previous version of the Sendoso HubSpot app. If you connected Sendoso with HubSpot before April 2026, we recommend updating to the new HubSpot app at your earliest convenience.
If you're looking for instructions on how to complete these steps with the new app, please review this article.
Workflow Extension
You can use our direct HubSpot activity Integration by following the following steps from within the Workflows.
1. Click on the plus to add a new activity
2. Scroll down on your Sendoso Sync'd account and click on the Sendoso Activity
3. Choose the type of inventory you'd like to send - eGifts will require an email, and Physical gifts will require appropriate address information, so please make sure you map the fields appropriately in the next selection!
Select the Campaign you've built from the dropdown menu.
4. Your new Sendoso Activity is complete!
Automate Workflows Off of Sendoso Activities
We have created custom Sendoso activity that allows you to trigger workflows off of Sendoso events, Campaign IDs, Campaign Names, etc.
To use this please:
1. Ensure you have timeline-write access from admin
2. After getting permissions, if you already have synced Sendoso and HubSpot, please re-sync to ensure this feature is synced properly.
In addition, we have created a custom Sendoso activity section under Activities.
Statuses will now appear like this in a Contact's Activity Feed
Webhook
Both of these integrations will be able to:
- Create workflows that will automatically trigger Sendoso eGifts and physical gifts.
- Track your sends through Sendoso Analytics and see when packages have been delivered for follow-up.
- Click on Create Campaign under Campaigns tab
- Click on the desired Touch type from the Touch Type List. Add your desired products and fill out the required fields for the Campaign.
- Select your Touch to be Triggered Sending Based on Integration and Click Next Step.
- Click on HubSpot Integration Button and Click Next
- Click on 'Here' to Sync HubSpot.
- Select your HubSpot application to sync with the Campaign.
- Click on Copy URL and Use it for Webhook Callback on HubSpot Workflows. Click Next to proceed further.
- Click on Revoke HubSpot to revoke the Synced Account or to add another HubSpot Account.
- Now Map Address Fields to HubSpot Contact Property Attributes. We have gone ahead and pre-populated each field but if you'd like to change the field, click the drop-down and select a different field. Every field is mandatory to select.
- Click Next to proceed further.
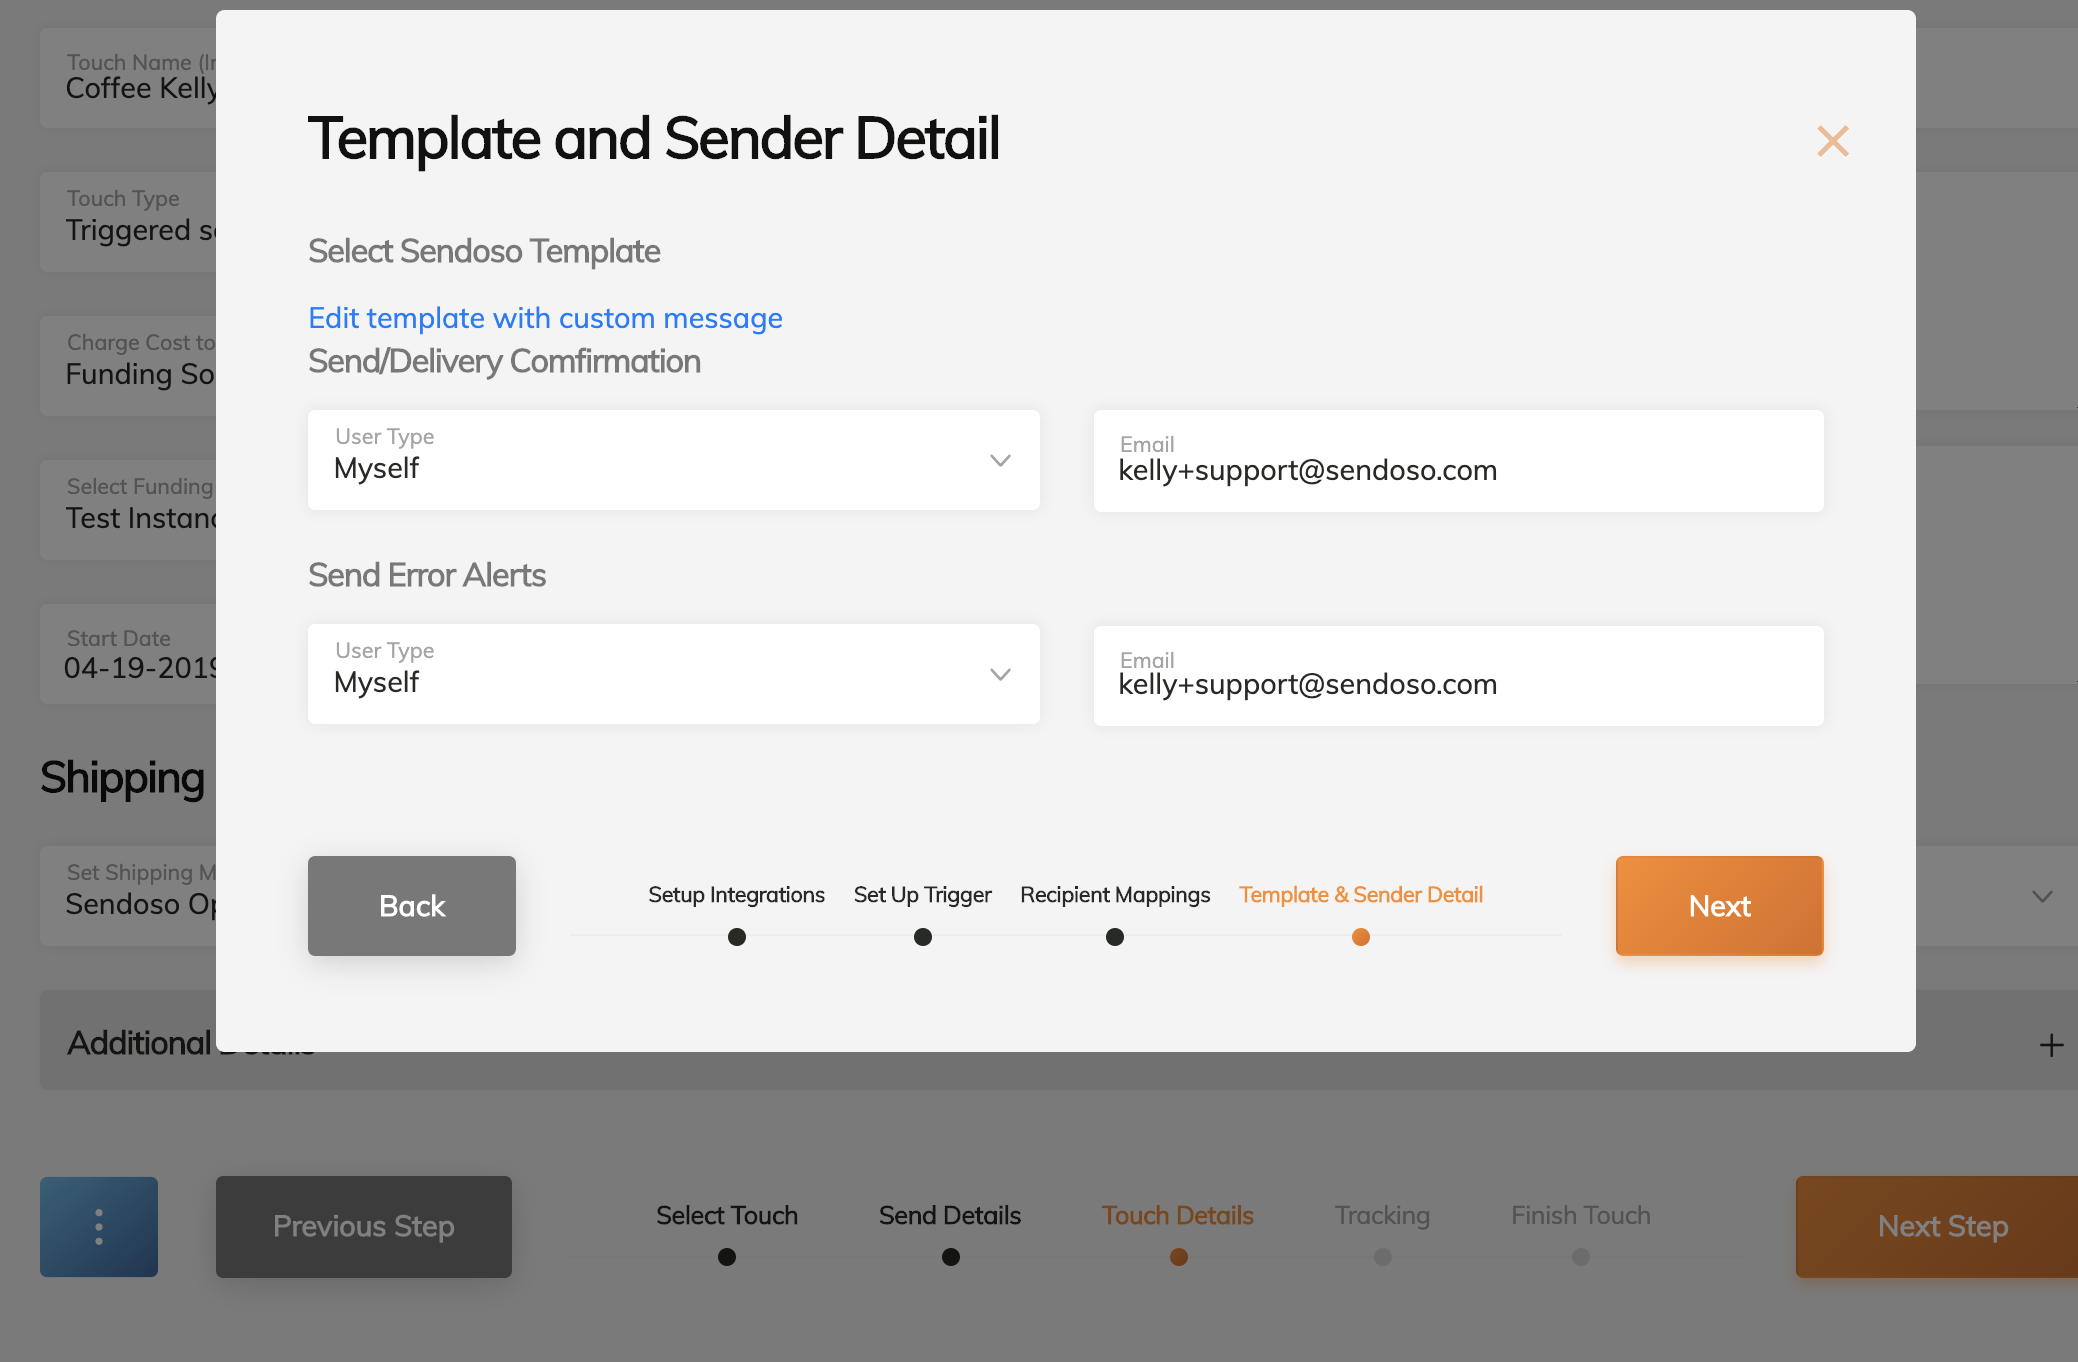
- Select Template and Sender Detail. Here is where you choose who you'd like to receive the package status updates.
- If Bundle has Multi Style Products select one.
-
Click Next to proceed further.
-
If you're sending a bundle with a printed or handwritten message then you can customize the message and insert custom HubSpot field variables:
- Want to sync with Salesforce Campaign? You can set this up by selecting a campaign and mapping status fields.
- Click Next to finalize your Campaign.
- Your Campaign is now set up successfully. Click Finish.
Setting up the Webhook in HubSpot
- Log in to your HubSpot Account.
- You will see the Dashboard of HubSpot, now click on Automation Tab and select Workflows to create a workflow.
- Click on Create Workflow button to start.
- Rename the Workflow Select the Contact Based type then click on Create Workflow.
- Setup the Trigger and add Action against trigger to activate Workflows.
- First Click on Set Enrollment Triggers to set trigger.
- Then select the trigger type Automatically then select the Contact Property as Trigger criteria.
- Select specific Property and fill out the condition-based criteria and mark it Done.
- Trigger setup is now complete
- Next click on the Add icon to add Action, and the sidebar will appear. Search Webhook in the search bar and select Trigger Webhook.
- Enter the Webhook URL you copied from your campaign setup in Sendoso. Then click on Use Request Signature, it's mandatory for authentication.
- Add in Sendoso's App ID. Copy 32825227 and paste into App ID field.
- Click Save
- Action creation is completed and now it is time to activate this Workflow.
- Currently, Workflow is off, for activating we have to click on Review button and then turn it on.
- Workflow setup is complete and webhook is now ready to be triggered!
Troubleshooting
1. Not created due to 429 Too Many Requests: This error will be created when your recipients are missing the required address information.
- Duplicate sends to the same recipient with the same campaign are not supported.
2. “The webhook server returned an error” Server Response: The response body for this request was empty. Status code: 400: This error will be created when a workflow is set up in Sendoso and there is a webhook process completed in HubSpot. This is only resolved after the workflow setup is correctly set up in HubSpot instead.
3. Provider Account is Missing: This sync error is known to occur when the campaign creator and sync or when the HubSpot synced user doesn't have manager access in HubSpot.